For Christmas this year I wanted to make all of my Christmas gifts, I wanted it to be a homemade holiday. My boyfriend also has two adorable nephews H and G, ages one(ish) and two(ish). I decided I wanted to make them a toy box each. I searched pintrest for ideas and sizes because being a mother of two happy rat terriers I had no idea about toddlers, toys and toy boxes. I had many ideas but little experience with children. I figured I would get a rough idea and go with the flow.
My original idea had included a lid, but from talking to my friends with children or friends who have grown children I learned that lids and toddlers do not mix. I tried to find anti-slam hinges but they were ugly, difficult to find and expensive.
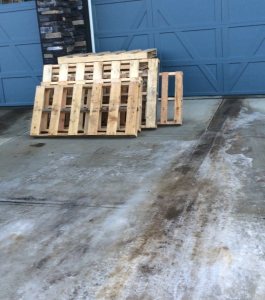
After all the designing I put in the request to my dad for a few pallets and a day later a truck load of pallets arrived in my driveway.
A word on pallets: yes pallets are free or almost free but they do require a lot of effort. You have to find them, haul them home and chop them up. Then when all that is done you have to sand it, sand it and sand it again. So, it would have been easier to go to the hardware store and buy some 1 x 4 or 1 x 6 lumber, but I really wanted the rustic pallet look. So, I began to chop the pallets up.
I used a reciprocating sae to cut the pallets apart. This took a very long time and it took about 25 hours of work per toy box from pallet tear down to finished and ready to paint toy box.
Pallets may be cheap or free but they are labour intensive.
And we begin…
Here are the pallets waiting for me when I got home. Thank-you Dad!
I have a plan but when you work with pallets that has to change to suit the materials you have.
I decided on the nice 3/4″ thick boards I found.

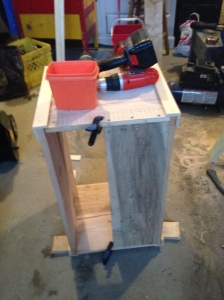
I made the frames first 24″ x 14″ and held them temporary with brad nails from my air gun.
then I drilled a pilot hole with a bit smaller than my screw and screwed each from together with three screw each.
I used three screwed because these are toy boxes and they need to be tough and take a beating.

To get the height I stacked the frames together and made sure I had enough wood for the bottom.
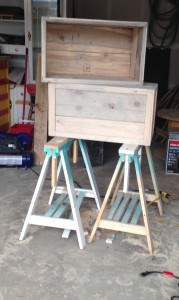
This is the point where my wonderful boyfriend sanded each frame section with a palm sander before I assembled the frame sections together.


I cut the bottom to fit in between the frames and then secured it with screws from each side.
To hide the screws I frames out the box with 1/4″ x 2″ wooden survey sticks that I had on had from other projects.
I used the wooden survey sticks to attach and hold the frames together.
I buy the survey sticks from any hardware store in the lumber section. I use them for many projects.
Here are the boxes finished and ready for stain.


I used Varathane’s Sun bleached wood stain. It is almost like barn-wood and it works great with the pallet board.
I used a brush to coat the box then I rubbed it with a rag to rub it into the grains.
I love the way it turned out! This is my new favourite stain.


Here is a complete side with one coat.

I used leftover pieces of the survey sticks to put the boy’s initials on the boxes.
I used Minwax wood finish stain in Ebony for the letters and rubbed it in with a rag.
I then took the used rag and rubbed it all over the edges of the box for an aged look.


I wanted handles and my dad suggested using an old belt.
I could’t find and old belt for cheap but I did find a 6′ length of belt from Tandy Leather Stores, they are a leather supply store found here in Canada.
I got the belt in the scratch and dent bin for next to nothing and it worked perfectly.
I pre drilled holes in the leather then secured them with 1/2″ wood screws with a wide head and used a washer under the head of the bolt to prevent it from pulling through the leather.

And best of all they are 100% Rosie approved!
Thanks for reading and,
HAPPY CRAFTING,
~ Nicole
