Up cycle Pallet Toy Box

For Christmas this year I wanted to make all of my Christmas gifts, I wanted it to be a homemade holiday. My boyfriend also has two adorable nephews H and G, ages one(ish) and two(ish). I decided I wanted to make them a toy box each. I searched pintrest for ideas and sizes because being a mother of two happy rat terriers I had no idea about toddlers, toys and toy boxes. I had many ideas but little experience with children. I figured I would get a rough idea and go with the flow.

My original idea had included a lid, but from talking to my friends with children or friends who have grown children I learned that lids and toddlers do not mix. I tried to find anti-slam hinges but they were ugly, difficult to find and expensive.

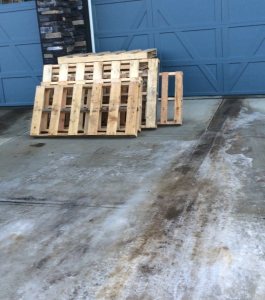
After all the designing I put in the request to my  dad for a few pallets and a day later a truck load of pallets arrived in my driveway.

A word on pallets: yes pallets are free or almost free but they do require a lot of effort. You have to find them, haul them home and chop them up. Then when all that is done you have to sand it, sand it and sand it again. So, it would have been easier to go to the hardware store and buy some 1 x 4 or 1 x 6 lumber, but I really wanted the rustic pallet look. So, I began to chop the pallets up.

I used a reciprocating sae to cut the pallets apart. This took a very long time and it took about 25 hours of work per toy box from pallet tear down to finished and ready to paint toy box.

Pallets may be cheap or free but they are labour intensive.

And we begin…

Here are the pallets waiting for me when I got home. Thank-you Dad!
 IMG_0763

I have a plan but when you work with pallets that has to change to suit the materials you have.

I decided on the nice 3/4″ thick boards I found.

 IMG_7313

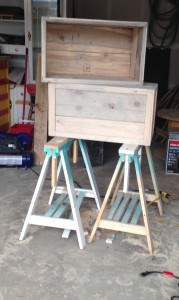
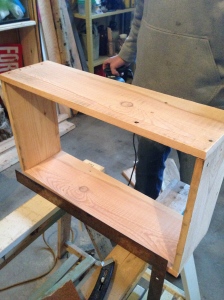
I made the frames first 24″ x 14″ and held them temporary with brad nails from my air gun.

then I drilled a pilot hole with a bit smaller than my screw and screwed each from together with three screw each.

I used three screwed because these are toy boxes and they need to be tough and take a beating.

 IMG_7331_2    IMG_7330_2

To get the height I stacked the frames together and made sure I had enough wood for the bottom.

This is the point where my wonderful boyfriend sanded each frame section with a palm sander before I assembled the frame sections together.

  IMG_7321_2    IMG_7314

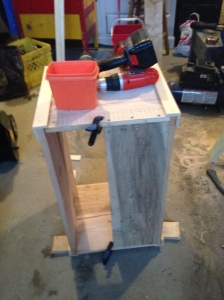
I cut the bottom to fit in between the frames and then secured it with screws from each side.

To hide the screws I frames out the box with 1/4″ x 2″ wooden survey sticks that I had on had from other projects.

I used the wooden survey sticks to attach and hold the frames together.

I buy the survey sticks from any hardware store in the lumber section. I use them for many projects.
     IMG_7333_2

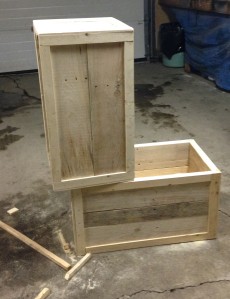
Here are the boxes finished and ready for stain.

 IMG_7338_2          IMG_7341_2

I used Varathane’s Sun bleached wood stain. It is almost like barn-wood and it works great with the pallet board.

I used a brush to coat the box then I rubbed it with a rag to rub it into the grains.

I love the way it turned out! This is my new favourite stain.

 IMG_7345_2   rustolem

Here is a complete side with one coat.

    IMG_7344_2         IMG_7347_2

I used leftover pieces of the survey sticks to put the boy’s initials on the boxes.

I used Minwax wood finish stain in Ebony for the letters and rubbed it in with a rag.

I then took the used rag and rubbed it all over the edges of the box for an aged look.

 IMG_7353_2 IMG_7354_2

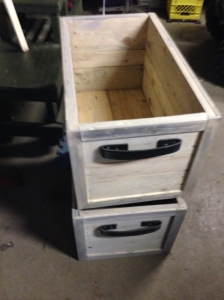
I wanted handles and my dad suggested using an old belt.

I could’t find and old belt for cheap but I did find a 6′ length of belt from Tandy Leather Stores, they are a leather supply store found here in Canada.

I got the belt in the scratch and dent bin for next to nothing and it worked perfectly.

I pre drilled holes in the leather then secured them with 1/2″ wood screws with a wide head and used a washer under the head of the bolt to prevent it from pulling through the leather.

IMG_7357_2

And best of all they are 100% Rosie approved!

IMG_7360_2

Thanks for reading and,

HAPPY CRAFTING,

~ Nicole

Ten Minute Wine Glass Storage Fix

I have a tiny little kitchen and only two full sized cabinets for glasses and plates. Not to mention I have 10′ ceilings and full height cabinets. I moved from a much larger house and did I mention I am a glassware hoarder?

I have been searching for a wine glass holder. My choices are limited in the Great White North and the only option was to order something online, get them to ship it up here and then pay duties and import taxes which can sometime be very expensive. My only options were going to cost me $80. No way.

I had plans on making something with my router and wood but I stumbled across this out of luck at Pier1 plus it took ten minutes to install. Insert Happy Dance here!


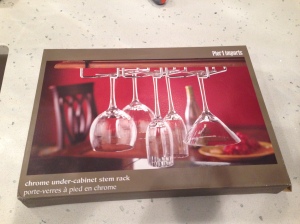
here is the package from Pier1 plus it was under $20


IMG_5618


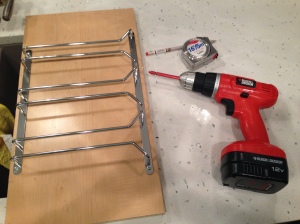
All the tools I needed!

IMG_5614

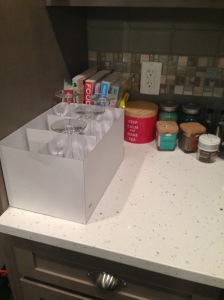
I was storing my wine glasses on my counter because I am a glassware hoarder.

IMG_5615

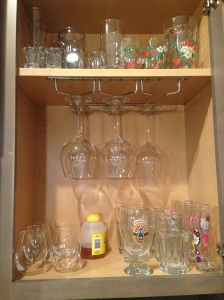
and here is the final result. There is some wasted space on the side but considering I saved $60 I can live with that.

IMG_5616

Happy Crafting

~ Nicole

Two Toned Hutch

Last summer  I was scrounging my favourite spots for furniture and found an aweome deal on a Canadian maple hutch, table and four chairs. It’s candaian made and right out of the 80’s. It’s my exact vintage actually! I knew this would work perfectly in my new place.

I cleaned it out and scrubbed it down. I let it dry and coated it in two coats of white primer. I let it dry 24 hours between coats just to be sure it’s dry. Then I painted it with this lovely shade of grey–it’s a mistint so I can’t tell you the name of the colour. I don’t have any before pictures. I left the inside of the hutch primer white because I like the crispness of the primer against the softness of the grey.

IMG_2216

IMG_2215


IMG_2326

IMG_2325


And here she sits in my dining room with my other Funky Junky and Interesting Upcyles.


Happy Crafting,

~Nicole

Antique Crock Side Table

Crock side table.


My dad sent me a picture via text about a crock. I got super excited because I love the old flour stoneware crocks that are floating around the prairies. I especially like to find them for a good price. I got this one and the 2 gallon one, which are both in mint condition.


When he sent me the picture I did not full appreciate the size of this crock. When I arrived to pick it up it was huge. I wasn’t even sure it should fit in my mini cooper.IMG_5589


Dad found them in the garage of a 72-year-old man who grew up on a farm in Saskatchewan. He and his brother would go everyday and fill it full of water from the well and take back to the farm-house. The crock moved with them as they travelled across the prairies until his family finally settled in Alberta in the early 1970’s.


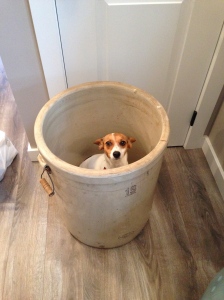
I got this giant beauty home finally. I kept in my front foyer and Rosie decided it was a good place to hide from the thunder.


IMG_5427So, Dad and I got out my mini bandsaw and I found a nice piece of pine board in my wood stash and viola! Antique crock side table. I am not worried about it breaking because this is a huge and thick crock. It has survived travel across the prairies and being handled by teenage boys


I couldn’t be happier with how it turned out. Now I need to decide what colour to stain it. Should I go barn board grey? Vintage Singer sewing machine red or something completely different?IMG_2332 IMG_2331


Shrunken Sweater Chair Reupholster

IMG_3709

Sure there are a million other things to do with a shrunken sweater. There are even ways on Pintrest to un-skrink it, but hey I have four of these really pretty antique chairs that are covered in a not-so-me greenish-grey velour. It doesn’t match my decor but it is sturdy. I use this chairs in my house for decoration and seating occasionally when I have  lots of people over. They are not my everyday chair because they are tiny and a little bit delicate.

So, I shrunk my favourite sweater accidentially . I love the colour and the fit and everything about this sweater. Then one day I accidentally washed it on hot water and it became a tiny sweater. Darn! I kept it and knew that I would do something with it when inspiration hit. Plus the shrunken sweater will not fray like a normal sweater would. If you do not have a shrunken sweater you can make one from an old sweater hiding in your closet or one from a thrift store.


Tools:

Shrunk sweater

chair

stapler

scissors


Here is my shrunken little beauty. It is officially toddler sized now.

IMG_3683

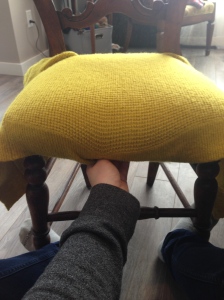
I sized the sweater to the chair and I needed it to be a little bigger to fit. I used my legs to stretch it out. Don’t worry pull it, you will hear the fabric stretching. Just don’t pull hard enough to rip it (The odds are slim, but anything is possible.)

IMG_3687IMG_3689

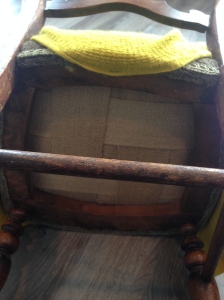
The chair and it’s underside

 IMG_3684IMG_3685

More stretching and I cut the sweater down the back to create a flat piece of fabric to work with

  IMG_3690 IMG_3692

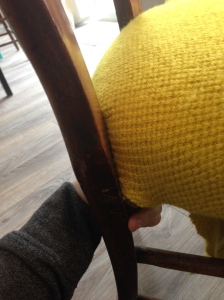
I started at the back of the chair and stapled then moved to the front.

IMG_3693IMG_3696

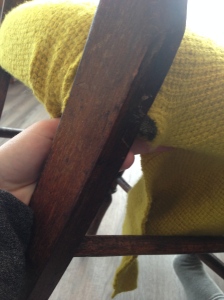
and pull it behind the fabric and wood frame. Be sure to pull it tight to keep the fabric nice and flat.

IMG_3694 IMG_3695

a close up. Be sure to keep the fabric tight in order to keep out wrinkles and then just trim the extra fabric that hangs down to keep everything neat and tidy looking.

IMG_3698 IMG_3699IMG_5588

The finished piece and I didn’t even have to remove the old fabric. I left it underneath to add more support to the shrunk sweater.

 IMG_3721

Happy Crafting

~ Nicole

Buralp Wreath with Metal Star

I love fall and I love burlap, it’s so rough and pretty. Seriously, what’s not to love?

Recently one a trip to Newfoundland I noticed that everyone has a metal star on their home. I love these metal stars so I scoured Alberta to come up empty handed. I gave up. Then I on a happy accident I found a beautiful black metal star to match my blue and black duplex. I love the east coast colours so naturally my home is east coast blue with gorgeous black stone and matching trim. I couldn’t say no. So, naturally I took the black metal star home.

Then I came across the blog  mycrazygoodlife while searching burlap wreaths on Pintrest. It’s a descriptive and simple “how-to” for a burlap wreath. So I was inspired to make a burlap wreath and combine my black star so I can hang it on my front door for a little more privacy. the large glass pane allows anyone who walks up my front steps to peer right into my home. I have a feeling curtains are next.

Here is how I made my wreath:

Supplies.

One large metal star from Rafters ( Brand Stargazer Originals made in Mississauga)

30 yards or 27.3 meters of 6″ wide burlap which worked out to be 3 AShland brand burlap rolls from Michael’s

One 24″ metal wreath blank from Michael’s

A pile of patience

and whatever adornments you want to make your wreath pretty

I followed the instructions for making the wreath from mycrazygoodlife posted above. I pretty much followed them exactly except I did not use floral wire to secure the beginning  of each burlap strip I used the small brown twin that held the roll together as part of the packaging.

Here are a few tips that I used to make my wreath.

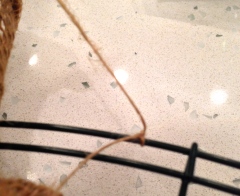
Double knot the twine onto the frame.

IMG_2245

then tie the tail. Voila easy peasy right?

IMG_2249

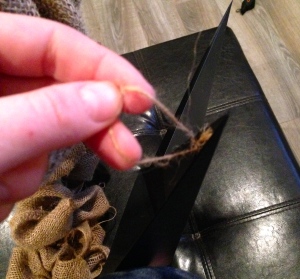
Leave a long tail on the wreath if you plan to hang it by a strap over the door instead of a traditional metal hook.

the long tail for hanging and star holding

then take the tail and put it through this hole

the holder from the store that I used to attach the star to the wreath. Loop the tail in there.

loop in into here and pull through.IMG_2259

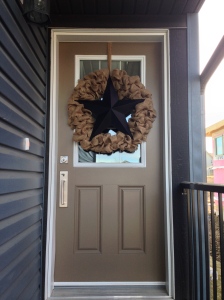
And here it is on my door. It’s been up from October 2014 until today and it is in great shape. I did not seal it with anything.

IMG_2292

Happy Crafting

~Nicole


Check it out on HOMETALK here